What is Auto-Exposure Bracketing?
Auto-exposure bracketing, or AEB, is a term that is used to signify a process where the camera automatically takes two or more exposures but with different exposure values. Basically, the camera takes different levels of exposure so that you essentially have a dark, middle and light exposure. You can have more than just 3 brackets however this is the main concept. Think of it sort of like this diagram:

Although the camera is automatically doing the bracketing, you have to set the parameters. In most camera settings you can set the dark and light exposure relative to the middle exposure. If you want the dark and light exposure to be 1 f/stop brighter and darker than your middle exposure then you will set your brackets to -1/+1. This camera feature can come in very handy when dealing with different photography situations. Let us talk about some of the situations when you would want to use auto-exposure bracketing and why.
Landscape Photography
When shooting outdoors you get what you get. If the weather is co-operating you can get some really amazing photographs. Landscape photography is one of the most challenging types of photography though because all scenes are not created equal or even relatively equal. This is a great chance for you to use auto-exposure bracketing or manually bracket your images. By using auto-exposure bracketing on landscape photography you can get a lot more clarity out of the images. You can adjust your brackets so that you can get the richest of blue skies and the shadows in the tree line in your dark exposure while at the same time capturing the brightest white flowers and fluffy clouds that may be in your foreground. The middle exposure might handle all the grass and grays from the mountain peaks off in the distance while also capturing the light and color tones on the leaves and anything else that is evenly exposed.
Real Estate Photography
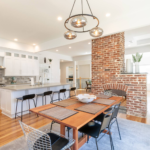
Much like landscape photography, real estate photography comes with its share of challenges. Every home is not created equal and every room is not evenly lit. A lot of times homes will have very bright vibrant wall colors while simultaneously having very dark furniture or kitchen cabinets. This can be very challenging for a camera to capture in just one exposure with proper color tones and light reproduction. This is a perfect opportunity to use auto-exposure bracketing.
Portrait Photography
This is a less commonly used technique for portrait photography however it can be very helpful especially if you find yourself in a bind. Again, the goal of auto-exposure bracketing is to get different exposures and in portrait photography, you are usually only focused on one exposure, that of the subject. However, there are many times where you can use auto-exposure bracketing to emphasize the subject especially if they are of lighter skin tones set against a darker backdrop or vice versa. Also, you may find yourself in a bind because your flash stopped working or your natural light source disappeared behind the clouds to never return again…no problem!! In these scenarios, auto-exposure bracketing will be your best friend and your hero!!
Macro Photography
Macro photography is a great time to do auto-exposure bracketing because you can really enhance the clarity of your images this way. When you get different exposures of an image you are really able to bring in each exposures strongest points later on in editing. So with macro photography, and getting that close to your subject matter, you often lose a little clarity and detail but auto-exposure bracketing will really help bring back the richness and of your images.
Now What?
Just getting the AEB images is the beginning. You will need to use some sort of editing program, like Adobe Lightroom or ON1 Photo RAW, to process these images so that way you can make the most of your photography. Now go out and make some amazing images!!


